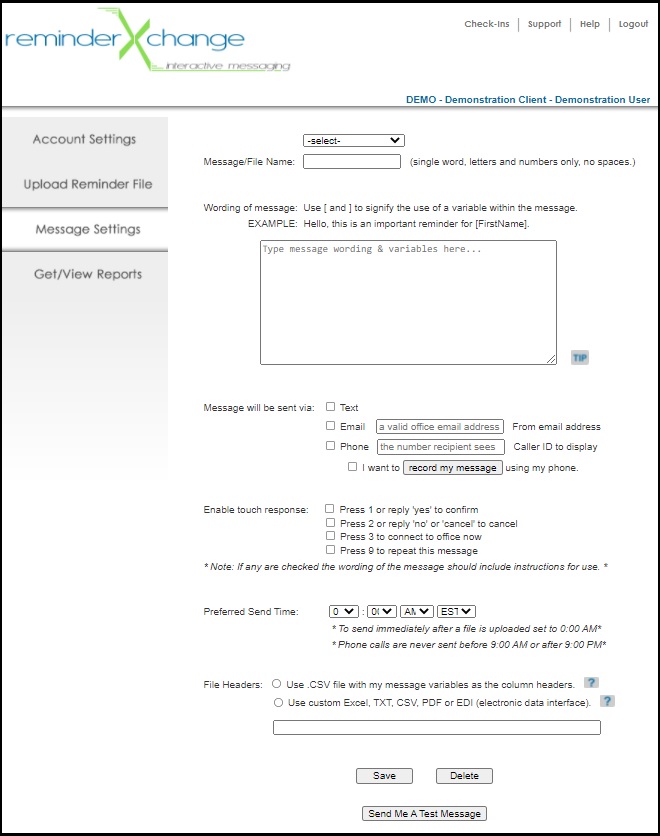
Message Settings
Messages that are sent out for your account are based on the information and settings in this screen. Users set the wording, message type (voice-text-email), enable touch response, set preferred send time and all other configurations here for each message. Messages are identified by a unique name and can implemented for any type of business or purpose.
A sample message is pre-configured to be used as a reference on how to set up your own messages. You may cut-n-paste, edit and modify from this message to assist you in creating new messages for your account.
To enter a new message simply click on the '-add new message-' option in the dropdown selection box of the Message/File Name field. Enter a unique name for this message. If you plan to upload a corresponding file, this name/identifier must also be within that filename.
MESSAGE SETTINGS SCREEN:
For voice/phone messages, users can choose to use the reminderXchange female synthesized voice (by typing in wording) or to record the message using their own voice over the phone. To utilize the reminderXchange voice, type in the wording of your message. You may also use control codes to format the message as explained more below. For best results, try and keep messages short, clear and conside. For phone messages spell words how they sound.
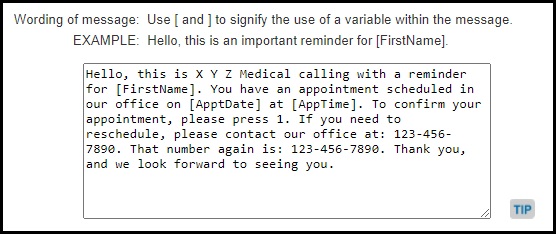
Note: Information used in the message from your file/list (like the person's first name) must be housed within brackets [ ]. These are known as variables and they correspond to the columns in your file/list. In addition, the following control codes may be used to format text and email messages:
- For texts use [nl] as a variable to advance to the next line.
- For texts use ul= attached to the front of a word to underline it.
- For texts use hl= attached to the front of a word to make it a hyperlink.
- For emails use cl= to center a word on a page.
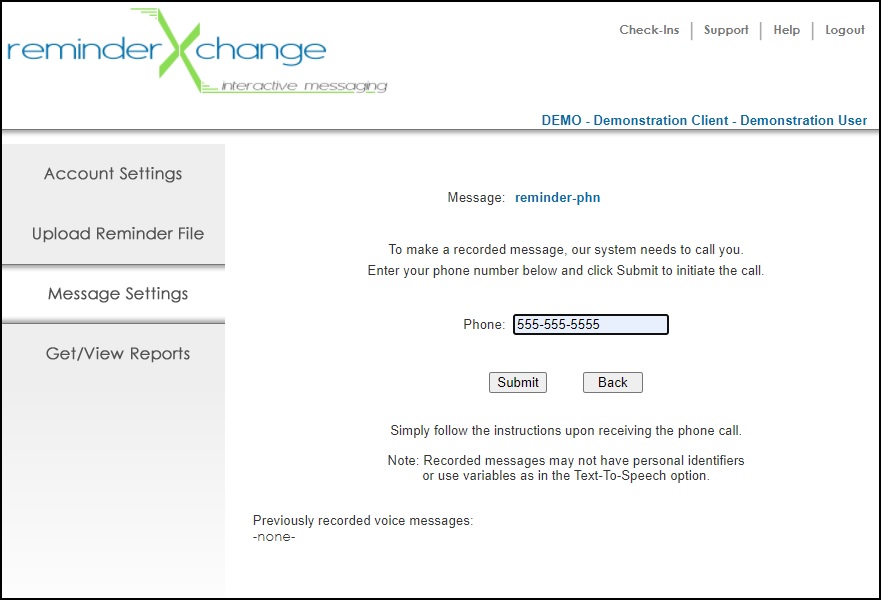
To record your own message for voice/phone messages, click on the 'record my message' button and enter your phone number in the phone number field on the message recording screen and then click Submit. Our system will immediately call you at the number you entered and prompt you through the simple process of recording your message. You can record and review your message until you have it just the way you want it before saving.
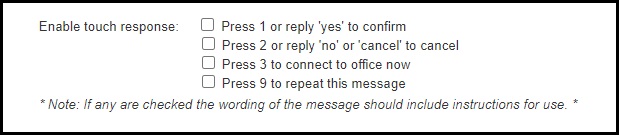
If you would like the receiver of a message to respond you can enable that functionality here. Please be aware that the wording of your message should include instructions for each reponse.
For voice/phone responses message receivers can press '1' to confirm, press '2' to cancel or deny, press '3' to immediately transfer the call to your office or press '9' to repeat the message from the beginning.
For text responses message receivers can press enter '1' or 'yes' to confirm or enter '2' or 'no' to cancel or deny. If a receiver responds by typing in a personalized message their entire response will show on the daily results report in the 'Confirmation' column.
If you would like your messages to go out immediately after uploading your file, do not set/enter a Preferred Send Time.
If you would like your messages to go out at a certain time then enter/set that preferred time and time zone.
Please keep in mind that due to varying amounts of network traffic and loads on our systems, the actual send time of your file(s) will also vary (but should be close to what you have set it to.

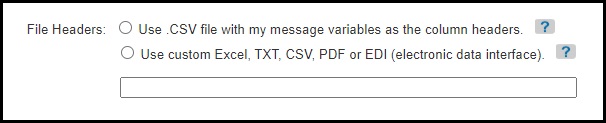
File Headers are the names of the columns of your report/list that gets uploaded for messages to be sent. If your account has worked with reminderXchange and has a pre-set interface in place, then set this to 'custom'. The word 'custom' will display in the box at the bottom. Our system will recognize each file that comes in for your accout and match it up with the appropriate message.
- ReminderXchange Support dept. has programmed to my file.
- The file's name I upload is predetermined or unrestricted.
If your account does not have a pre-set interface and you are processing a standard/regular message file or even a one-time message blast, you should choose the 'use CSV' option. The variables within your message wording will automatically populate as the column headers in the box at the bottom and you will need to verify that those are also the column headers, in that order, in the file that will be uploaded.
- The file's name I upload must include the message name.
- First column must be contact's phone number or email address.
- All message variables should be listed in the box below the options and used in your uploaded file as the column headers.